
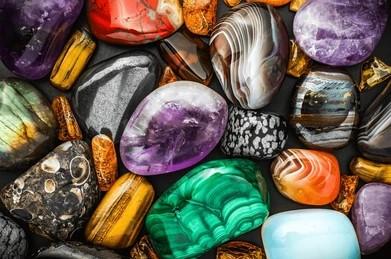
Using a rock tumbler is not the only way to get a polished stone. Hand polishing has been around far longer than electric tumblers.
A rock tumbler is excellent for processing batches of rough, similarly-sized material into rounded, polished stones. But delicate mineral rocks below Mohs 5 would be destroyed by four weeks of rotary grinding. And this is where hand polishing comes in.
For individual specimens, flat surfaces, and anything with shape or features worth preserving, it is the best method. What it requires is patience, the right progression of abrasives, and an understanding of what you're trying to achieve at each stage. This guide covers everything you need to know about hand polishing tools, materials, methods, and the grit progression that separates a genuinely polished stone from one that just looks clean.
What You Need For Hand Polishing
The materials list for hand polishing is simple and inexpensive. Most of what you need is available at hardware stores, auto parts suppliers, and lapidary supply shops. They include:
- Sandpaper: This is the most important material needed. Silicon carbide sandpaper designed for automotive and metal finishing stays intact when wet, cuts stone efficiently, and is available in the full grit range you need. You need to buy a range of: 60, 120, 220, 400, 600, 800, 1000, and 1500 grit, and they are available in auto parts stores or online stores. You may not use all of them on every rock, but having the full range lets you work any material.
- Polishing Compound: Polishing compound is what produces the final gloss. Cerium oxide is the standard for agate, jasper, chalcedony, and quartz, and produces an excellent glass-like finish on silica minerals. Aluminum oxide is a general-purpose compound that works across a wide range of materials and is a good default if you're working with mixed or unknown materials. ZAM compound works on metal-containing minerals and produces a high luster on pyrite, hematite, and similar specimens.
- Water: A bucket of water for keeping the surface wet during sanding. Dry sanding generates dust, clogs the sandpaper faster, and on silica minerals produces crystalline silica dust that is a genuine respiratory hazard. Always sand wet.
- Rock polishing cloth: This is needed for polishing and achieving the final shine.
- Protective gloves: For safety purposes, use protective gloves to protect your hands during the process.
- Old toothbrush: A toothbrush is needed for scrubbing the rocks clean. Some rockhounds also use toothpaste to add more shine to the rocks.
How to Polish Rocks by Hand Using Sandpaper
Here is a step-by-step process of hand polishing a rock using sandpaper.
Step 1: Clean the Rocks

First, start by cleaning the rock.
- Fill a small bucket with warm, soapy water.
- Soak the rocks briefly, then scrub them with a sponge or toothbrush to remove dirt and debris.
- Pay attention to cracks and crevices where grime collects.
- Rinse with fresh water and keep a bucket of clean water nearby for use during sanding.
An old toothbrush works well for stubborn spots.
Step 2: Shape with Coarse Sandpaper

The next step after cleaning the rock is to start shaping with sandpaper.
- Start with 220-grit sandpaper (or 80-grit for very hard stones).
- Moisten the sandpaper and place it grit-side up on a flat surface.
- Wet the rock and rub it against the sandpaper to round edges and smooth corners.
- Rewet the rock as needed and continue until you achieve the desired shape.
This stage may take 10–15 minutes, depending on hardness.
Step 3: Remove Heavy Scratches
Now switch to the 400–500-grit sandpaper. Then use circular motions to buff out deep scratches left by the coarse grit. Keep the rock wet to reduce dust and check progress.
Smoothness at this stage improves the final shine. Remember to always keep both sandpaper and rock wet during sanding, as this reduces dust and improves results. Then rinse the rock after each grit to check progress.
Step 4: Polish with Fine Sandpaper

The next stage is where you switch to 1200-grit sandpaper for a fine finish.
- Sand evenly to remove light scratches and bring out a natural sheen.
- Keep the rock wet so scratches are visible and can be corrected.
- By now, the rock should feel smooth and begin to show a matte polish.
Keep the rock wet so you can spot any scratches or abrasions that have been missed while sanding. Use consistent, gentle motions rather than pressing hard.
Step 5: Buff with Polish

After working through different grits of sandpaper, it is time to add the polish.
- Dry the rock completely.
- Apply a small amount of polishing compound to a thick cloth (denim or cotton works well).
- Rub the rock in circular motions, adding more polish if needed.
- Use light pressure to avoid scratching the surface.
If you do not have a polishing compound, use other alternatives such as toothpaste, mineral oil, car wax, or commercial rock polish. Buff with a clean section of cloth until the rock glistens.
Step 6: Final Rinse and Finish
Rinse the rock under fresh water to remove any residue. Allow the rock to dry fully before handling to prevent smudges or dust from dulling the finish. Test dryness by touching with a cloth; if no polish transfers, it's ready to display. During this process, patience is key — harder stones take longer but yield a brilliant finish.
Read More: How to Use a Dremel Tool to Cut and Polish Rocks
Which Rocks Polish Well by Hand
Not every rock rewards the effort of hand polishing equally. Knowing what polishes well helps you decide which specimens are worth the time.
Excellent results: Agate, jasper, and chalcedony polish to a glass-like finish with minimal effort on a properly prepared surface. These are the best hand polishing candidates and the most satisfying to work with. Quartz crystals polish well on their faces; keeping the crystal terminations intact is where hand polishing beats tumbling entirely. Petrified wood polishes beautifully and shows incredible grain detail once polished. Obsidian polishes fast and to an exceptional mirror finish. Thunderegg halves with flat cut faces are ideal hand polishing candidates; the flat surface makes even coverage straightforward.
Good results with care: Fluorite polishes well but is soft (Mohs 4) and scratches easily — use fine grits from the start and very light pressure. Calcite polishes to a good sheen with fine grits and toothpaste or tin oxide as a final compound. Hematite and pyrite polish well with ZAM compound and produce a striking metallic finish.
Difficult or poor results: Granite and basalt are too coarse-grained to polish to a true gloss by hand; the mineral boundaries between crystals prevent a uniform surface finish. Sandstone and limestone are too soft and porous for a high polish regardless of method. Selenite and gypsum are so soft that sandpaper at any grit tends to scratch rather than smooth; a dry buff with very fine compound is the most they can handle.
Read More: 6 Best Ways to Open a Geode Without Ruining the Crystals
Final Thoughts
Hand polishing is a skill that gets faster with practice. The first time through the grit progression on a piece of agate takes longer than it should because you're learning what each stage should look like and building the feel for when a surface is ready to move forward. By the third or fourth specimen, the process becomes intuitive, and you stop counting minutes and start reading the surface.
Start with a flat-faced thunderegg half or a slab of agate if you have one. Follow the grit progression without shortcuts. Check the surface between every stage. Move to polishing compound only when the 1500-grit surface genuinely looks ready. The result will make the process make sense in a way that reading about it cannot.
Read More: How To Cut and Polish Thundereggs Beautifully
Frequently Asked Questions
You can skip grits if the surface condition allows it. Moving from 220 directly to 600 is fine if the 220 scratch pattern is fine enough that 600 removes it efficiently; this depends on the hardness of the rock and how well the 220 stage was done. What you cannot do is skip from 220 to 1500 and expect 1500 to remove 220 scratches. Each grit removes the scratches from the previous one, and the jump in grit size between stages determines how much work each stage has to do. When in doubt, work every grit in sequence. The time saved by skipping is usually less than the time spent going back.
A thunderegg half starting at 220 grit is already smooth from the saw and takes roughly two to three hours through the full progression to a polished finish on agate. A rough specimen starting at 60 or 120 grit takes longer, depending on how much material needs to be removed. An already-tumbled stone that just needs a better polish can be brought up in thirty to forty-five minutes. The honest range is forty-five minutes for simple work to a full evening for a specimen being brought from rough to mirror finish.
Yes, and this is one of the most common uses for hand polishing. Tumbled stones sometimes come out of the barrel with a dull rather than glossy finish. This usually means the polishing stage was too short or contaminated. Starting at 800 or 1000 grit and working through the progression to polishing compound typically brings a dull tumbled stone to a noticeably better finish in under an hour.
Cerium oxide, without qualification. It works on agate, jasper, chalcedony, quartz, and petrified wood — the most common materials a beginner is likely to be working with. It produces an excellent finish, is widely available from lapidary suppliers, and is forgiving enough that small errors in preparation are less likely to show through than with some other compounds. Buy cerium oxide first and add tin oxide or aluminum oxide later if your material range expands to softer minerals.