
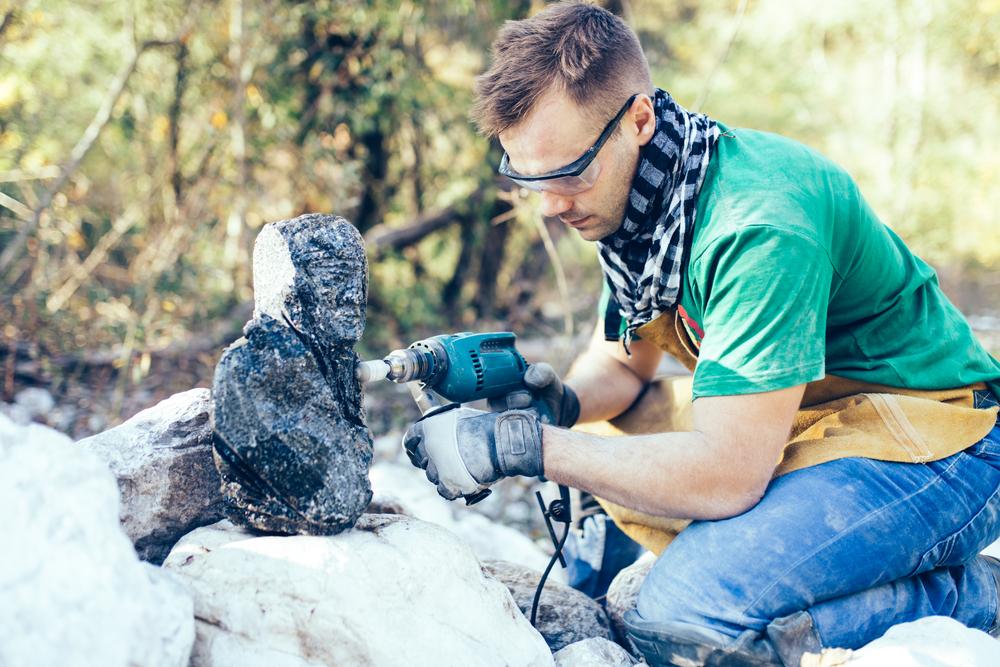
You don't need a full lapidary workshop to start shaping rocks you collect during your rockhounding adventure. You don't need a $1,000 trim saw, industrial polishers, or a garage packed with specialized equipment, either. A Dremel tool can help. When used properly, it can cut small to medium stones, shape rough pieces into cabochons, clean up crystal faces, and polish rocks into display-worthy specimens.
That said, while a Dremel is incredibly versatile, it does have its limits. In this guide, you'll learn what rocks you can realistically cut, which tools and bits you actually need, how to cut and polish step by step, essential safety precautions, common beginner mistakes to avoid, and when it might be time to upgrade to a trim saw. Let's get started.
Can You Really Cut Rocks With a Dremel?
A Dremel can absolutely help you cut, shape, and polish rocks. I've done it, so have plenty of rockhounds. But it's not a magic wand, and it's not a substitute for proper lapidary equipment. It's a practical tool for small, controlled projects.
A Dremel is best suited for small to medium-sized stones, especially when you're working on thinner pieces or doing detail work. It performs well for trimming rough edges, shaping cabochons, refining slabs, and even cleaning up crystal faces. For hobbyists and collectors who prioritize precision over power, a Dremel is a highly practical and versatile tool.
However, it's not designed for heavy-duty cutting. Thick geodes, large dense rocks, and deep, straight cuts can quickly overwhelm a rotary tool. In those situations, a dedicated trim saw, or lapidary saw, will be far more efficient and produce cleaner results.
In short, if you're doing detailed shaping, light cutting, or polishing work, a Dremel is incredibly useful. But for major cuts through large, solid rock, you'll want something built specifically for that job.
What Rocks Work Best with a Dremel?
A Dremel works best on moderately hard stones, especially those in the quartz family. These rocks are durable enough to hold polish but still manageable with diamond-cutting and grinding bits. If the rock is small to medium-sized and quartz-based, a Dremel will handle it well. If it's large, extremely dense, or requires deep straight cuts, you may want heavier equipment.
Ideal Rocks for a Dremel include:
- Agate
- Jasper
- Chalcedony
- Quartz
- Amethyst
- Petrified wood
Most of these stones rank around 6.5 to 7 on the Mohs hardness scale. That means they're hard enough to be durable, but still workable with the right diamond attachments and patience. They respond well to shaping and polishing, making them perfect for beginner and intermediate projects.
Also, softer minerals like fluorite and calcite cut quickly, but that's not always a good thing. They can chip, flake, or even crack if you apply too much pressure or run your tool at high speed. When working with softer stones, reduce RPMs and use a light touch.
Dense igneous rocks like granite or basalt can be shaped with a Dremel, but the process is slower and more demanding on your bits. Expect increased wear on diamond attachments and longer working times. For large, dense pieces, a trim saw is often more efficient.
Related Read: How to Choose the Best Rockhounding Tools for Winter
Essential Dremel Attachments for Cutting and Polishing Rocks

A Dremel is only as effective as the accessories you pair it with. It requires you to pair with the right attachments. Whether you're cutting, shaping, or polishing, the right bits and wheels make the difference between rough results and professional lapidary finishes.
Below are the must-have attachments for rock carving and stone polishing.
- Corded vs. Cordless Dremel Tools: Corded models such as the Dremel 4000 or 4300 provide consistent power, making them ideal for cutting and shaping dense stones like quartz and granite. Cordless models like the Dremel Lite 7760 offer portability and flexibility, but they are less suited for heavy-duty rock carving.
- Diamond Bits: This is designed for hard materials like quartz, agate, and granite, and is perfect for shaping, carving, engraving, and detail work. You can get it in multiple shapes (ball, cone, cylinder). Diamond bits are non-negotiable attachments for your Dremel tool.
- Cutting Wheels: Cutting Wheels are the best for trimming rough edges and shallow cuts. This is useful for separating small pieces of stone. Diamond cutting wheels outperform standard abrasive discs. While Dremel cutting wheels are ideal for small cuts, for deep or large cuts, a trim saw is more efficient.
- Sanding Attachments: This used for smoothing edges and refining shape. It is available in multiple grit levels (coarse to fine). Get the ones with interchangeable sleeves, as they allow grit progression from shaping to pre-polishing. Gradual grit progression ensures a scratch-free finish
- Polishing Wheels and Pads: These attachments bring out the stone's natural shine. Felt wheels, rubber points, and diamond pads are used with polishing compounds to maximize luster. Quartz-based stones like jasper and agate respond especially well, making polishing wheels essential for finishing your work.
- Drill Bits (For Holes and Design Work): Standard or diamond-coated drill bits let you create pendant holes, add decorative patterns, and carve deeper designs. Always use water when drilling into stone to reduce heat buildup and prevent damage to both the bit and the rock.
Other relevant tools to keep handy include:
- Polishing compound (e.g., cerium oxide or similar) -- Enhances gloss and finish
- Water spray bottle -- Keeps the rock cool and reduces silica dust
- Safety goggles -- Protects eyes from debris and stone fragments
- Respirator mask (rated for silica dust) -- Essential for lung protection
- Clamp or vise -- Stabilizes the rock while cutting or shaping
A Dremel paired with the right attachments becomes a versatile lapidary tool for hobbyists and rockhounds alike. From carving intricate designs to polishing cabochons, the proper setup transforms raw stone into a polished masterpiece.
How to Cut Rocks with a Dremel (Step-by-Step)

Here is a step-by-step process to cut rocks using a Dremel tool:
- Step 1: Secure the Rock: Never hold a stone in your fingers while cutting. Use a clamp, a vise, or a stable work surface. A rock slipping off while you are cutting will cause injuries.
- Step 2: Mark Your Cut: Draw your cutting line with a pencil or marker. This keeps your cut controlled instead of guessing mid-way.
- Step 3: Attach a Cutting Wheel: Set your speed to medium-high (15,000--20,000 RPM). Do not max it out immediately, instead let the wheel build up gradually.
- Step 4: Let the Tool Do the Work: Do not push hard. Apply light pressure and let the diamond grit grind slowly. Move steadily. Pushing too hard overheats the bit, fractures the stone, and strains the motor.
- Step 5: Keep It Wet: Spray the stone frequently with water or dip it in water between passes. Wet cutting reduces dust, extends bit life, and prevents cracks.
Once cut, switch to diamond bits. These allow you to round corners, carve, create curves, and remove rough spots. Work slowly, rotate the rock, and maintain symmetry.
How to Polish Rocks with a Dremel
Polishing transforms a dull stone into a shiny finish. Here is how you can polish rocks properly after cutting:
- Coarse Sanding (80--120 grit): This is the first step where you remove tool marks and refines shape. All deep scratches must be gone here.
- Medium Sanding (220--400 grit): This is the second stage, where you smooth visible scratches and refine the surface. The stone should look matte but even.
- Fine Sanding (600--1200 grit): Here, you remove haze and prepare for polish. The rock will look dull but smooth.
- Pre-Polish/Final Polish(1500--3000 grit): Prepare the surface to feel silky and ready for final polish. Then use a felt wheel with cerium oxide (for quartz family stones) or aluminum oxide compound. Run at low speed with light pressure. The shine develops quickly.
Read More: Rock Cleaning and Polishing Techniques for Winter | DIY Tips at Home
Common Mistakes (And How to Avoid Them)
If you're new to cutting and polishing rocks with a Dremel, a few simple mistakes can cost you time, bits, and even good specimens. Here's what to watch out for, and how to fix it.
- Pressing Too Hard: Excess pressure breaks diamond bits and can crack your stone. Let the tool do the work. Use light, steady pressure and patience.
- Running at Maximum Speed: High speeds overheat both the rock and the tool, causing fractures or motor strain. Stay in the medium speed range and keep the stone cool with water.
- Skipping Grit Levels: Jumping from coarse sanding straight to polishing leaves scratches and a cloudy finish. Progress gradually through grit levels. Each stage removes marks from the previous one.
- Dry Cutting: Creates hazardous silica dust and increases heat buildup. Always use water for cooling and dust/heat control. Wear a respirator rated for fine dust.
- Trying to Cut Large Geodes: A Dremel isn't built for deep slab cuts or thick geodes. Use a trim saw for larger cuts. Save the Dremel for detail work and smaller stones.
- Not Cleaning Between Grit Stages: Coarse particles contaminate finer sanding and polishing steps. Rinse the rock and clean your workspace between grit changes.
- Not Going for Quality Attachments: Cheap bits wear down quickly, overheat, or fail when working with hard stone. Investing in high-quality attachments saves time, reduces frustration, and produces better results. With the right combination, you can cut efficiently, shape precisely, smooth evenly, and polish beautifully.
Conclusion
Rock carving and polishing with a Dremel is all about patience, precision, and the right attachments. By securing your stone properly, working with diamond bits and cutting wheels, keeping the surface wet, and progressing through sanding grits step by step, you can transform rough specimens into polished pieces of art.
Ensure to avoid mistakes like pressing too hard, skipping grit stages, or dry cutting. Instead, keep practicing, and go for quality attachments and steady technique to shape and polish your rockhound finds and reveal the hidden beauty inside every stone.
Related Read: The Ultimate Guide to the Best Rockhounding Tools for Beginners
Frequently Asked Questions
Most stones respond well to medium speeds between 15,000 and 20,000 RPM. Harder stones like agate and quartz may require slightly higher speeds, but overheating should always be avoided.
Yes. Quartz can be cut with a diamond cutting wheel. However, quartz produces silica dust when dry-cutting, so wet cutting and proper respiratory protection are strongly recommended.
While not mandatory, water dramatically reduces dust, lowers heat, and improves results. Wet cutting is considered best practice, especially when working with silica-rich stones.
Only if you have proper ventilation and dust control. Cutting stone produces fine particulate matter that should not be inhaled. Outdoor work or garage setups with airflow are much safer.
Small geodes can sometimes be opened with patience and repeated shallow passes. However, thicker geodes are better handled with a slab saw for cleaner results.
Diamond burr bits for shaping, followed by fine sanding drums or pads, and finished with a felt polishing wheel and polishing compound such as cerium oxide for quartz-based stones.