
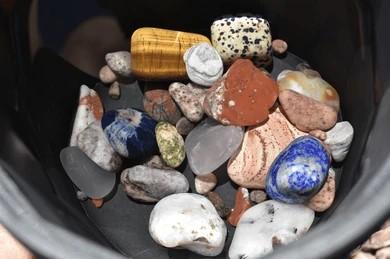
You must have heard of rock tumbling, but not know what it requires or how it is done. It is simply turning ordinary rocks into polished, beautiful stones for display.
Rock tumbling is one of the most satisfying hobbies you can try as a rock collector. You collect a handful of dull, rough stones and slowly transform them into smooth, shiny gemstones with beautiful colors and patterns for your collection.
In this beginner-friendly guide, you'll learn how to use a rock tumbler step by step, the types of rocks that polish best, and tips to avoid common mistakes.
What Is a Rock Tumbler?

A rock tumbler is a machine that polishes rocks by slowly rotating them in a barrel with abrasive grit and water. The natural equivalent of this is when rivers and ocean waves cause the tumbling of rocks against each other in flowing water, producing the smooth rocks and pebbles you pick up on the riverside. As the tumbler spins, the rocks rub against each other and the grit, gradually smoothing their rough edges and polishing their surfaces.
The rock tumbling process is simple, but it does require patience. Most rock tumbling cycles take several weeks, but the results are worth it. There are two main types of rock tumblers:
- Rotary Tumblers: Rotary tumblers are the most common type and what most starter kits contain. The barrel rotates continuously, end over end, causing rocks to tumble against each other in a slurry of grit and water. Rotary tumblers round the rocks as they polish, wearing away the edges and shaping them — the finished result is a smooth, rounded stone. They are affordable and easy to operate.
- Vibratory Tumblers: Vibratory tumblers vibrate rather than rotate, which smooths and polishes the surface of rocks without significantly changing their shape. If you have an interesting natural shape worth preserving, a vibratory tumbler keeps it. They're faster than rotary tumblers — roughly half the time per batch — and use significantly less grit. But they are quite noisy and more expensive to own.
For starters, rotary tumblers should be your go-to. With experience, you can switch to vibratory tumblers.
What You Need Before You Start
A rock tumbler uses grit, water, and constant motion to smooth and polish rough stones over time. Here is everything you will need during the rock tumbling process:
- A Rock Tumbler: The main tool. You can choose between the two types according to your needs. A suitable budget ranges from $60 for a starter kit to $180 for something more durable.
- Tumbling grit: The abrasive that smooths and polishes the rocks. You need silicon carbide grits in four grades: coarse (60/80 mesh) for Stage 1, medium (120/220 mesh) for Stage 2, fine (500 mesh) for Stage 3, and pre-polish or polish compound for Stage 4. Most starter kits include small quantities of each, but they run out faster than expected — have replacements ready before you start your second batch.
- Polishing compound: Needed for the final stage. Aluminum oxide is the standard for most mixed batches of agate and jasper. Cerium oxide produces a slightly higher gloss on pure silica minerals. Check what your kit includes and know what to buy more of.
- Plastic pellets or ceramic media: Small plastic or ceramic cylinders used as filler when you don't have enough rocks to bring the barrel to the right level, and as cushioning for rocks in the later stages as pieces get smaller. Many kits include a small bag — you will need more eventually.
- A dedicated strainer or colander: For rinsing rocks between stages. Never use kitchen equipment for rock tumbling after it has been used with grit. The silicon carbide particles are nearly impossible to fully remove and will contaminate food preparation surfaces.
- A dedicated bucket: For collecting and disposing of spent grit slurry. Never send grit slurry down a household drain — the abrasive particles damage pipe interiors and septic systems. Strain the slurry into the bucket, let the solids settle, pour the clear water onto soil or lawn, and put the solid grit in the trash.
- Old towels: For cleaning surfaces during the process. Ensure you are working on a stable surface away from living areas — your tumbler will run 24 hours a day for weeks. A garage, basement, or utility room is ideal.
Read More: How To Cut and Polish Thundereggs Beautifully
Choosing the Right Rocks for Tumbling

Before tumbling your rocks, identifying and picking the right rocks is very important. Fractured, porous, or overly soft material will never polish well, no matter how carefully you follow the steps. The better the material going in, the better the results coming out. Here are factors to consider:
- Hardness: Rocks below Mohs 5–6 are too soft for rotary tumbling. They erode faster than they polish, create excess slurry, and often end up as gravel. Save soft rocks for hand polishing or gentle vibratory tumbling. Always tumble rocks of similar hardness together — mixing Mohs 7 agate with Mohs 4 calcite means the softer mineral will be destroyed long before the harder one is finished.
- Integrity: Inspect every rock before loading. Fractured stones break apart and scratch others; porous rocks trap grit and contaminate later stages. Hold each rock to a strong light to check for cracks, pits, or porosity. When in doubt, leave it out.
- Size Variety: Use a mix of sizes (¼ inch to 1½ inches for a 2–3 lb barrel). A variety of sizes improves tumbling action compared to uniform pieces.
Rocks That Tumble Well
For beginners, choose materials in the Mohs 6.5–7 range. These polish reliably and at similar rates:
- Agate: The king of tumbling stones, with spectacular polish and color patterns.
- Jasper: Available in many colors and varieties, tumbles beautifully.
- Tiger's Eye: Produces a striking chatoyant (cat's eye) effect.
- Petrified Wood: Fascinating patterns and colors, polishes well.
- Rose Quartz: Lovely pink hue, easy to tumble.
Other excellent choices include obsidian, chert, and flint. You can also tumble these groups together:
- Chalcedony: agate, bloodstone, carnelian, chrysoprase, jasper, chert, flint, petrified wood
- Quartz: amethyst, aventurine, citrine, milky quartz, rock crystal, rose quartz, smoky quartz, tiger's eye
- Rock types: andesite, basalt, diorite, gabbro, granite, mookaite, novaculite, quartzite, unakite
All of these fall within the ideal hardness range and polish well when properly prepared.
The Four Stages of Rock Tumbling
Rock tumbling runs in four main stages, and each stage uses a different type of grit to gradually smooth and polish the stones. This process can run for 4–6 weeks, 24 hours a day — but the reward makes the long process worth it.
Stage 1 — Coarse Grind (60/80 grit, 7–10 days)
Stage 1 is the most important stage. It shapes the rocks, removes sharp edges, and determines the quality of everything that follows. Edges not removed in Stage 1 cannot be removed in later stages.
- Add two tablespoons of coarse 60/80 grit for every pound of rock in the barrel.
- Add water and seal the barrel. Run the tumbler continuously for seven to ten days.
- After seven days, open the barrel and rinse a few rocks under water. Examine them wet — the rock should be noticeably rounder with no sharp edges remaining. The surface will be rough and scratched, which is correct at this stage.
- If any rocks still have sharp edges, reload with fresh coarse grit and run Stage 1 again. Moving forward with improperly rounded rocks will produce a poor result at every subsequent stage.
Cleaning Between Stages
Always clean thoroughly between stages. To clean:
- Strain the spent slurry into your disposal bucket.
- Rinse the rocks in the colander until the water runs completely clear.
- Scrub the inside of the barrel, the lid, and the seal with a brush — grit lodges in every crevice and must be physically removed, not just rinsed.
- Rinse the barrel until no trace of grit remains.
- Inspect each rock individually as you rinse. Remove any that have cracked or developed new fractures during tumbling.
This cleaning step takes ten to fifteen minutes and is critical to the tumbling process. Never skip it.
Stage 2 — Medium Grind (120/220 grit, 7 days)
Stage 2 removes the coarse scratches from Stage 1 and refines the surface.
- Add two tablespoons of medium 120/220 grit per pound of rock, and add water to the correct level.
- Add plastic pellets at this stage to make up for the volume lost as the rocks got slightly smaller in Stage 1, and to cushion the rocks against chipping. Run for seven days.
- After tumbling, the surface should have a texture like frosted glass — uniformly fine with no visible deep scratches from Stage 1. If you can still see coarse scratches, run Stage 2 again with fresh medium grit before proceeding.
Stage 3 — Fine Grind (500/600 grit, 7 days)
Stage 3 refines the surface further in preparation for polishing. This is where rocks like agate and jasper start to reveal translucency and pattern as the surface gets finer.
- Add one tablespoon of fine 500/600 grit per pound of rock and add water.
- Add plastic pellets — only use pellets that have already been through earlier tumbling stages, as the edges of fresh pellets can scratch rocks at fine grit. Run for seven days.
- After seven days, the rocks should have a soft, matte sheen. Hold them up to a light to see the details.
- Clean thoroughly to remove any trace of 500-grit silicon carbide. If carried into the polishing stage, it will scratch your rocks during the final step.
Stage 4 — Polish (aluminum oxide or cerium oxide, 7 days)
Stage 4 is the final stage. No grit is used here — just the polishing compound, which works by burnishing the surface to a high gloss rather than by cutting.
- Load one tablespoon of aluminum oxide or cerium oxide polishing compound per pound of rock, add water, add pre-tumbled pellets, and run for seven days.
- At the end of Stage 4, rinse the rocks under clean water. Rocks that looked like coarse gravel eight weeks ago will come out looking like polished gemstones — vivid color, translucency in the agate and jasper, and a smooth surface that catches the light.
You can also burnish after this stage — burnishing removes the polishing film and adds a deeper, cleaner luster to the finished stones.
Read More: How to Display Rocks and Minerals (Simple, Safe Ideas for Collectors)
Common Rock Tumbling Mistakes to Avoid
- Overfilling the Barrel: Too many rocks prevent proper tumbling motion. Fill to about two-thirds capacity.
- Mixing Different Hardness Rocks: Mixing hard rocks with soft ones destroys the softer material before the harder rocks are finished.
- Skipping Cleaning Between Stages: Leftover grit from earlier stages will scratch rocks during polishing. Cleaning is not optional.
- Stopping the Cycle Too Early: Rushing the process results in dull rocks. Each stage needs its full run time to work properly.
Final Thoughts
Rock tumbling is a rewarding process, no matter how long it takes. With the right tools and the right process, you can easily turn ordinary rocks into beautiful, polished gems ready for display.
Whether you're a beginner rockhound or simply someone who loves rocks and minerals, follow each stage completely, clean meticulously between stages, and do not rush the process. The results will speak for themselves.
Read More: 9 Best Rock Tumblers: A Complete Buyer's Guide
Frequently Asked Questions
Two tablespoons per pound for coarse and medium grits in Stages 1 and 2. One tablespoon per pound for fine grit and polishing compound in Stages 3 and 4. These ratios produce a slurry thick enough to work effectively without being so heavy that it impedes tumbling action.
No. Softer rocks erode faster than harder ones. Batch rocks by hardness level: Mohs 6.5 to 7 together, Mohs 5 to 6 together, and so on. Mixing them produces poor results for the softer material.
Anything below Mohs 5, anything fractured or deeply porous, anything with crystal terminations or surface features worth preserving, selenite, talc, mica schist, and most soft carbonates. Opals are too soft and too brittle for rotary tumbling. These rocks are better hand-polished.
No. The tumbler motor speed is fixed at the correct rate for effective tumbling action. What you can control is grit concentration and water level. Maintaining the right ratios at each stage is more effective than any other variable.
Display them, use them in jewelry making, or trade them at gem and mineral club meetings. Polished agate and jasper make excellent gifts and are easy to turn into pendants or cabochons with minimal additional work.