
Why Your Gear Matters
The wrong tool slows you down. The right tool keeps you safe and lets you extract clean specimens. This guide covers every category of rockhounding equipment — sorted by collecting style — so you buy what you actually need.
Surface Collecting Gear
Surface collecting is the simplest form of rockhounding. You walk exposed ground — gravel bars, desert washes, road cuts, beach cobble — and pick up what catches your eye. Most beginners start here.
Essential Tools for Surface Collecting
- Spray bottle — Water darkens stone surfaces and reveals color, banding, and translucency that dry specimens hide. This is the single most useful tool for agate and jasper hunting.
- Hand lens (10x loupe) — A Hastings triplet loupe gives distortion-free magnification. Inspect crystal faces, cleavage planes, and inclusions in the field.
- Knee pads — You will spend hours on the ground scanning gravel. Foam gardening pads or construction knee pads save your joints.
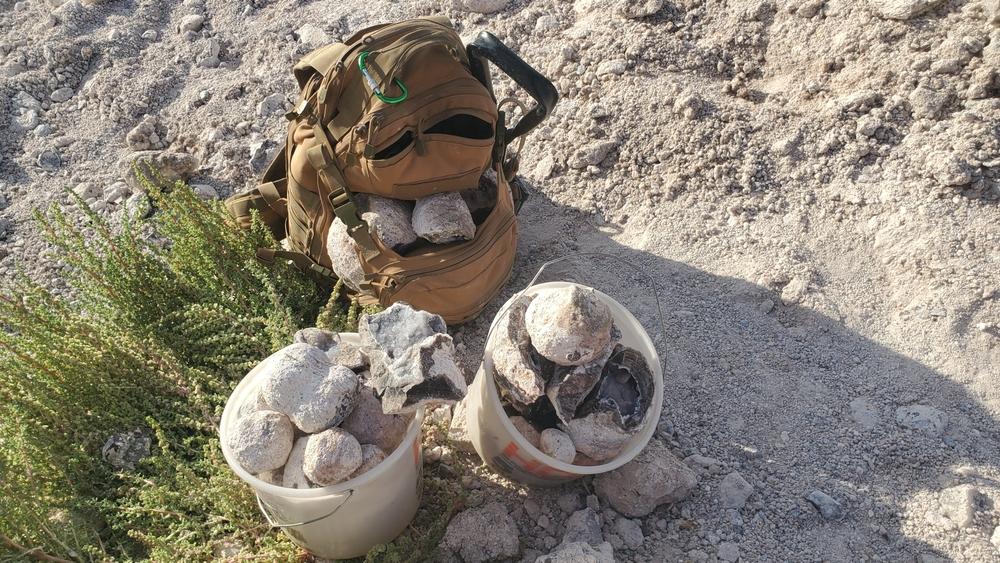
- 5-gallon bucket — Sturdy, stackable, and doubles as a seat. Drill drain holes in the bottom for wet-screening gravel.
- Field bag or backpack — Carry water, snacks, tools, and specimens. Look for bags with padded compartments to prevent damage to finds.
Specimen Protection
- Newspaper or bubble wrap — Wrap fragile crystals individually before packing. Newspaper is lighter; bubble wrap protects better.
- Egg cartons — Ideal for small specimens like garnets, tourmaline crystals, or thumbnail-size minerals.
- Permanent marker + masking tape — Label each specimen with the collecting location immediately. Memory fades; labels do not.
Hard-Rock Mining Gear
Hard-rock collecting involves breaking host rock to extract embedded specimens — quartz veins in granite, garnets in schist, geodes in limestone. This requires heavier tools and safety equipment.
Hammers
| Hammer Type | Weight | Best For |
|---|---|---|
| Geological pick (Estwing E3-22P) | 22 oz | General-purpose rock breaking, prying, and trimming |
| Crack hammer / hand sledge | 2–4 lb | Driving chisels, splitting geodes, breaking boulders |
| Sledgehammer | 6–10 lb | Heavy boulder work, mine dumps, large geode extraction |
A 22-oz geological pick handles 80% of field work. Add a 3-lb crack hammer if you plan to use chisels or work hard rock.
Chisels and Pry Bars
- Cold chisels (1/2" and 3/4") — For splitting rock along natural fracture planes. Use with a crack hammer.
- Flat-blade pry bar (18"–24") — Pry apart layers of shale, basalt, or limestone to expose fossil beds or mineral pockets.
- Gad pry bar — Pointed tip fits into cracks. Essential for pegmatite pocket mining.
Safety Equipment (Non-Negotiable)
- Safety glasses — Rock fragments travel at high velocity when struck. Standard sunglasses are not sufficient. Use ANSI Z87.1-rated impact glasses.
- Leather gloves — Protect against sharp edges, blisters, and abrasion. Mechanix-style gloves balance dexterity and protection.
- Steel-toe boots — Dropped rocks and hammers are a real hazard. At minimum, wear boots with stiff soles and ankle support.
- Hard hat — Required at mine dumps and road cuts where loose rock can fall from above.
Screening and Sifting Gear
Screening separates target specimens from surrounding material. This technique is essential for gem gravel, alluvial deposits, and fee-dig operations.
- Classifying screens (1/4", 1/8", 1/16" mesh) — Stack multiple mesh sizes to sort material by grain size. Smaller mesh catches sapphires, garnets, and small crystals.
- Shovel (pointed and flat) — A pointed shovel digs into banks; a flat shovel scrapes bedrock traps.
- Garden trowel — Precision digging in tight spaces or around exposed crystals.
- Tweezers or dental picks — Extract tiny crystals from matrix without damage.
Identification Tools
Knowing what you found is half the hobby. These tools let you identify minerals and assess quality in the field.
| Tool | What It Tests | Use Case |
|---|---|---|
| Streak plate (unglazed porcelain) | Streak color | Distinguish hematite (red streak) from magnetite (black streak) |
| Mohs hardness picks | Hardness | Test unknown minerals against known hardness standards |
| Magnet (rare earth) | Magnetic response | Identify magnetite, pyrrhotite, and iron-bearing minerals |
| UV flashlight (365nm longwave) | Fluorescence | Detect fluorite, calcite, willemite, scheelite, and uranium minerals |
| Acid bottle (dilute HCl) | Carbonate reaction | Calcite fizzes; dolomite reacts slowly when powdered |
UV and Night Collecting
Some minerals only reveal themselves under ultraviolet light. Fluorescent mineral hunting is a distinct sub-hobby that requires specific equipment.
- Shortwave UV lamp (254nm) — Reveals fluorescence in willemite, calcite, scheelite, and many other minerals. More expensive than longwave but covers more species.
- Longwave UV flashlight (365nm) — Budget option. Detects fluorite, some calcites, and uranium minerals. Many LED "UV" lights on Amazon emit 395nm — these are nearly useless. Verify 365nm wavelength before buying.
- UV-blocking safety glasses — Shortwave UV damages eyes. Wear UV-blocking polycarbonate glasses whenever using a shortwave lamp.
Navigation and Field Supplies
- GPS device or phone with offline maps — Many collecting sites have no cell service. Download offline maps (Google Maps, Gaia GPS, or OnX) before leaving pavement.
- Compass — Backup navigation when batteries die. Learn to use it with a topo map.
- Field notebook — Record GPS coordinates, specimen descriptions, formation names, and weather conditions at each stop.
- 1 gallon water per person per day — Desert sites exceed 110°F. Dehydration is the #1 safety risk in western rockhounding.
- First aid kit — Include butterfly bandages for cuts from sharp rock edges.
Vehicle Equipment
Many productive sites require leaving pavement. Your vehicle choice and preparation determine which sites you can reach.
- High-clearance vehicle (minimum) — Most BLM and Forest Service roads have ruts, rocks, and washouts that bottom out sedans.
- 4WD / AWD — Required for sand washes, steep grades, and wet conditions.
- Full-size spare tire — Not a donut. Sharp rocks puncture tires regularly on dirt roads.
- Tire repair kit and portable air compressor — Fix flats in the field without waiting for a tow that may never come.
- Recovery strap (non-elastic) — If you get stuck in sand or mud, another vehicle can pull you out.
- Tow rating on your vehicle — Know it. Respect it.
Gear by Collecting Style
| Collecting Style | Must-Have Tools | Budget (USD) |
|---|---|---|
| Beach/gravel surface collecting | Spray bottle, bucket, knee pads, loupe | $20–40 |
| Desert surface collecting | Above + GPS, 1 gal water/person, sun protection | $30–60 |
| Hard-rock vein mining | Geological pick, crack hammer, chisels, safety glasses, gloves | $80–150 |
| Gem screening (fee-dig or alluvial) | Classifying screens, shovel, tweezers, bucket | $50–100 |
| UV/fluorescent hunting | 365nm or 254nm UV lamp, UV safety glasses, dark location | $40–200 |
| Fossil collecting | Flat pry bar, dental picks, newspaper, field guide | $40–80 |
What to Skip
Save your money on these commonly over-purchased items:
- Rock tumbler — Useful for polishing, but has nothing to do with collecting. Buy one later if you want polished specimens.
- "Geology kits" from big-box stores — Imported specimens with no location data. They teach identification but add nothing to your collection.
- Expensive backpacks — A $15 bucket and a $20 daypack outperform a $150 "adventure pack" for most field work.
Build Your Kit Over Time
Start with surface collecting gear ($20–40). Add hammers and chisels when you find sites that require them. Buy a UV lamp after you confirm fluorescent minerals exist at your target locations. The best gear is the gear that matches where you actually go.
Browse our interactive rockhounding maps to find collecting sites near you, then gear up for what those sites demand.